In web development, taking screenshots to share with others (e.g. clients) is something that is done with some frequency. By default, taking screenshots produces hard-edged images and doesn’t look all that great. In order to add a little bit of a professional looking something extra, I like to add drop shadows to screenshots.
I work mainly on a Mac and the default screenshot functionality gives you several options for taking screenshots. Without any special software, like Photoshop, you can use the Preview app to annotate image with ease. However, one of the limitation of Preview is the inability to add treatments like drop shadows.
There are lots of image manipulation apps you can use to add drop shadows, but then you need to open another app to edit the image to add a shadow. Using Automator and a couple of command line tools you set up a keyboard shortcut that does this for you. It takes a bit of setup, but once you have the keyboard shortcut set it feels like built-in functionality regardless of what is going on behind the scenes.
My Solution
I took to the internet to find a solution. I know I am not the only one that wants to add drop shadows to screenshots, so I assumed someone had come up with a solution. After all, adding drop shadows is common enough for some 3rd Party screenshot tools to have a button for it. I am happy with the default screenshot capabilities of my Mac so I did not want to install a screenshot app solely to have drop shadow capabilities.
I came across a post on Stackoverflow that did most of what I was looking for. The main issue I had with the SO solution is it saved the image with the drop shadow to the clipboard instead of creating a file. This means I would have to use another app to get the image off of my clipboard. You can use the Preview app for this, which is not really an inconvenience because I am usually annotating the images anyway. Still, I’d rather have the screenshot saved to my Desktop just like default functionality. The script I found was easy enough to understand that I was able to tweak it to achieve what I was trying to do.
Here is the solution I am using:
/usr/local/bin/pngpaste /tmp/to-add-dropshadow.png
/usr/local/bin/convert /tmp/to-add-dropshadow.png \( +clone -background transparent -shadow 30x15+10+10 \) +swap -background transparent -layers merge +repage /tmp/has-drop-shadow.png 2>/dev/null
DATECMD=`date "+%Y-%m-%d %H.%M.%S"`
/bin/cp /tmp/has-drop-shadow.png ~/Desktop/"Screenshot $DATECMD".png
Like in the referenced Stackoverflow you have to install a couple commands, but unlike the post you do not need the command used to copy a temp file back to the clipboard. Instead of copying the output to the clipboard I simply copy it to the Desktop.
To get started you need to install a couple of commands using Homebrew. If you don’t have Homebrew you should go get it because it makes installing command line tools a breeze. The two tools you need are pngpaste, used to paste the clipboard content to a file that can be manipulated, and imagemagick, used to manipulate the image file. Installing them with Homebrew is super simple:
$> brew install pngpaste imagemagickHit enter and let Homebrew do its magic. Once these tools are installed you can create an Automator workflow that you can map to a keyboard shortcut. You may need to update the script depending on where Homebrew installs commands. To find where your commands are located you can use the which command. It looks like this:
$> which pngpaste
/usr/local/bin/pngpaste
In my case the commands are located in /usr/local/bin. It is safe to assume both of the required commands are in the same directory, but you use which again for the other command, convert to make sure. The convert command comes from the imagemagick library.
Setting up the script
The linked StackOverflow post has a more thorough set of instructions with screenshot, but here is a quick overview.
- Open the Automater app, and create a new “Quick Action”.
- Search for “Run Shell Script” and double click on it.
- In the “Workflow receives” drop down, select “No input”.
- Paste the above script into the text area (make sure to use the correct paths to the commands you installed) and save the workflow. Give it a meaningful name, like the recommended “Add Dropshadow To Clipboard Image” so you can find it easily when setting up the keyboard shortcut.
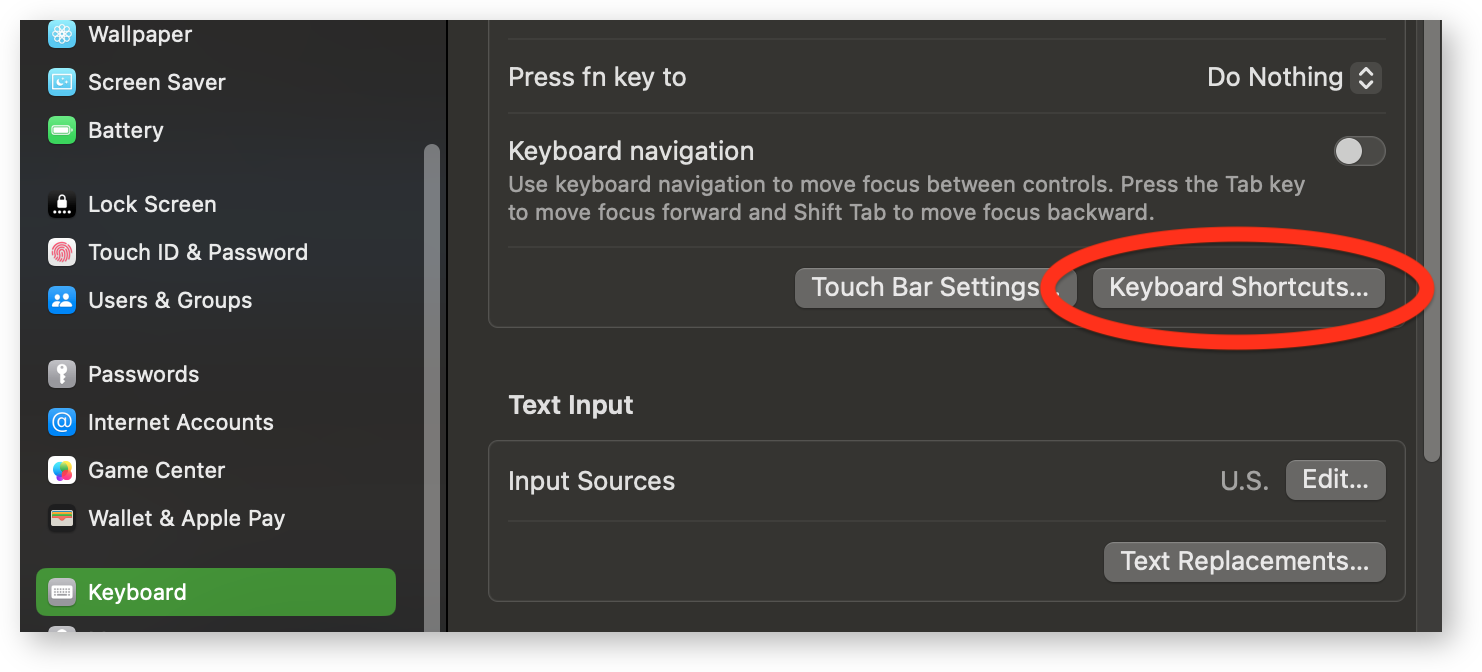
- Open the “System Settings > Keyboard” menu and click the “Keyboard Shortcuts” button.

- Next, select “Services”, expand the “General” section and your new service should be listed. Double click on the “none” and enter your desired Keyboard Shortcut by pressing the key sequence you want to use. I opted to use the suggested CMD + CTRL + Shift + 5 shortcut because it is almost the same as the shortcut use to take the screenshot making it easier for me to remember.

That is all you need to do, to test it out take a screenshot using CMD + CTRL + Shift + 4, punch in your new shortcut, and look at your Desktop, you should see the new image there. It’s hard to tell from the thumbnail, but there is a subtle drop shadow.
Additional Notes
The way this script is configure the shadow is very subtle, if you want a stronger shadow you can adjust your script. The 30x15+10+10 is the setting that controls the shadow’s appearance. This breaks down into opacity x blur_strength + horizontal_distance + vertical_distance and is documented in the imagemagick documentation here. Do be honest, the docs are not that helpful. Opacity, or how transparent the shadow is, can be a number (percentage) from zero (0) meaning completely opaque, to 100, completely transparent. Blur strength, or blur radius is how blurry the shadow appears, the higher the number the blurrier the shadow. The horizontal and vertical distances determine the shadows direction. The higher these numbers the more down and to the right the shadow appears, the lower the numbers (even negative) the more up and to the left the shadow appears. If set to zero (0) the shadow will appear directly behind the image with an equal amount of the shadow peaking out around all of the edges.
The filename used for the screenshot mimics the default screenshot filenames used for the US locale, but not exactly, I have configured the script to use the 24 hour format so the screenshots I take in the afternoon appear after the screenshots I take in the morning. If you want to configure the format to match the default you have to manually modify the DATECMD settings to be +%Y-%m-%d %l.%M.%S %p. You can change this to whatever you want. The reason the date is broken out from the final copy to the desktop is because of the space between the date and the time. Putting this inline with the copy command causes errors when attempting to rename the file.
This script makes use of the temporary files, the raw version of the screenshot to be manipulated (/tmp/to-add-dropshadow.png) and the manipulated version. The manipulated version (/tmp/has-drop-shadow.png) is ultimately what is copied to the desktop.
The script is just a couple of shell commands, this means that any shell commands can be run, so you can modify this script to do anything you want, for instance have the script clean up after itself by removing the /tmp files.
Conclusion
Adding subtle drop shadows can add a level of professionalism to screenshots. Most of the time the shadow will go unnoticed and may not feel like it is worth the effort. If you are adding the screenshots to documentation it helps the image “pop” and feel less hard-edged.
Here is a comparison of screenshots with and without the drop shadow. Seeing them next to each other lets you see just how subtle the shadow is and how much more “professional” it looks with the shadow. It also helps the image standout instead of blending in with the background.


The solution in this post is just one of many solutions for adding drop shadows to images, but it is one I am happy with. Although it requires two keyboard shortcuts, one to take the screenshot and one to add the drop shadow and save the image to the Desktop it prevents having to open an image manipulation application. This solution required me to switch from my favorite CMD + Shift + 4 shortcut to the CMD + CTRL + Shift + 4 shortcut, which saves to the clipboard instead of the Desktop. But, with the use of one additional shortcut I have a screenshot I am happy with and do not have to manipulate.
